The short answer
Install the Twinfig Chrome extension and plugin, open your app on localhost in Chrome, press ⌥⇧P to capture the full page or ⌥⇧E to pick one element, then paste into the Twinfig plugin in Figma with ⌘V. The capture arrives as editable layers.
Before you start
- Your app running locally, for example on localhost:3000
- Google Chrome 116 or later with the Twinfig extension
- The Twinfig plugin open in Figma
Steps
Install the extension and plugin
Add Twinfig for Chrome and the Twinfig plugin for Figma.
Open your app in Chrome
Start your dev server and open it, for example on localhost:3000 or localhost:5173. Preview deploys and staging behind SSO work the same way.
Capture
Press ⌥⇧P for the full page or ⌥⇧E to pick an element. The capture is copied to your clipboard.
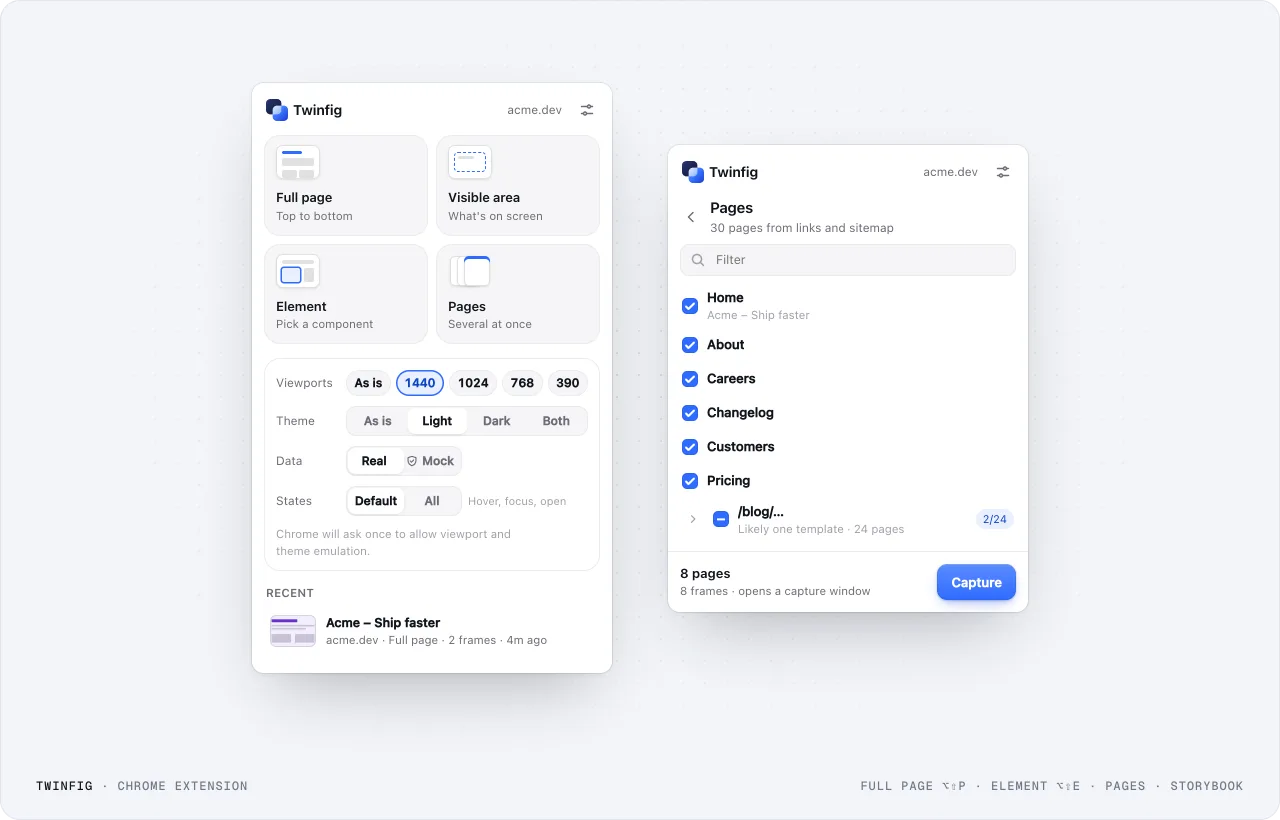
Chrome extension: capture modesFull page, visible area, one element or several pages, at the viewports, themes and states you choose. Paste into Figma
In the Twinfig plugin, press ⌘V. The page arrives as real layers.
Keep iterating
Recapture a frame in place after you change the code instead of starting over.
Which frameworks work
All of them. Twinfig reads what Chrome renders, so React, Next.js, Remix, Vue, Nuxt, Svelte, Astro, Tailwind and plain HTML work the same way. Apps running through the web target of Expo and React Native are detected and captured at phone widths.
Capture more than the resting state
Hover, focus, active states and open menus or dialogs can be captured and added as variants such as State=Hover. You can also capture several viewports and both light and dark themes in one run.
Automate a whole repo
The CLI can install a repo, start its dev server or Storybook, find the routes and capture each one into a bundle for the plugin.